
先日こんな記事を書きました。
プラグインを使って目次を表示させてみたのですが、以前追加したリストのデザインが有効になってしまいました。
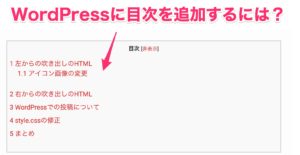
下記のような感じです。

↓↓リストを追加したときの記事↓↓
犬の足跡のアイコンが見出しにかぶってしまい見づらい感じになってます。
また見出しの文字の幅とか文字の色とか調整したいなと思い調整しました。
cssとphpのソースコードを修正するのでcss、phpを見たことない方はこの方法はあまりおすすめできません。
また、プラグインのphpを修正するのでバージョンアップしたときに動きを保証できないのでもし参考にする方は注意してください。
表示崩れ調整(記事内のcssが有効になっているので無効に)
修正ファイル
wp-content/plugins/table-of-contents-plus/screen.min.css修正する前にバックアップをとっておきましょう。
目次に使われているCSSはscreen.min.cssなので、それを修正する必要があります。
ただ、中身を確認するとCSSが1行で書かれています。
これはCSSの読み込みの転送量を抑えるためにそういうふうになっています。
なので、実体はscreen.cssがあるのでこの内容をscreen.min.cssへコピペすると見やすくなるでしょう。
先頭の一行はコメントアウトしておいてください。
↓↓のような感じです。

犬の足跡のアイコン非表示

Chromeのデベロッパーツールで確認すると下記のcssが有効になっていることがわかりました。
これはリストデザインを追加したときのものです。
これを適用させないようにする必要があります。
wp-content/plugins/table-of-contents-plus/screen.min.css上記のファイルに下記のソースコードを追記します。
これはinitialを使って犬の足跡のアイコンの要素内容を初期化しています。
    #toc_container ul li:before {
  font-family: initial;
  font-weight: initial;
  content: initial;
  position: initial;
  left : initial;
  color: initial;
}
追加すると犬の足跡のアイコンが消えます。
こんな感じです。まだ枠線が入ってしまってますのでこれを非表示にしたいと思います。

見出しの枠線非表示
#toc_container ulを追加
    #toc_container ul {
    border: initial;
}
#toc_container ul ul修正
3行目にborder: initial; を追加
    #toc_container ul ul {
    margin-left:1.5em;
    border: initial;
}
修正した結果以下のようになりました。
赤い枠線は消えましたが、2階層目の文字が大きいので調整します。

2階層目の見出しの文字サイズ初期化
#toc_container ul ulの修正
4行目にfont-size: initial;を追加します。
     #toc_container ul ul {
     margin-left:1.5em;
     border: initial;
     font-size: initial;
 }
2階層目の文字が初期化されて文字のサイズが統一されました。
ただ、見出しとの間隔が狭いので調整します。

見出しの間隔調整
#toc_container ul,#toc_container li の修正
4行目にmargin-bottom:0.5em;を追加する
     #toc_container ul,#toc_container li {
    margin:0;
    padding:0;
    margin-bottom:0.5em;
}
#toc_container ulの修正
3行目にmargin-bottom:1em;を追加する
     #toc_container ul {
    border: initial;
    margin-bottom:1em;
}
見出しとの間隔が空いて読みやすくなりました。
このままでも十分良いのですが、もう少しデザインを調整します。

目次のデザイン更に調整

以下のような感じに調整します。
- 2階層目のナンバリングをやめる
- 2階層目の文字を細くする
- 文字色の変更
toc.phpの修正
1219行目あたりのlist itemのところを修正します。
修正前
// list item
if ( in_array($matches[$i][2], $this->options['heading_levels']) ) {
        $html .= '<a href="#' . $this->url_anchor_target( $matches[$i][0] ) . '">';
        if ( $this->options['ordered_list'] ) {
          // attach leading numbers when lower in hierarchy

                $html .= '<span class="toc_number toc_depth_' . ($current_depth - $numbered_items_min + 1) . '">';
                for ($j = $numbered_items_min; $j < $current_depth; $j++) {
                        $number = ($numbered_items[$j]) ? $numbered_items[$j] : 0;
                        $html .= $number . '.';
                }

                $html .= ($numbered_items[$current_depth] + 1) . '</span> ';
                $numbered_items[$current_depth]++;
        }
        $html .= strip_tags($matches[$i][0]) . '</a>';
}
修正後
// list item
if ( in_array($matches[$i][2], $this->options['heading_levels']) ) {
        $html .= '<a href="#' . $this->url_anchor_target( $matches[$i][0] ) . '">';
        if ( $this->options['ordered_list'] ) {
                // attach leading numbers when lower in hierarchy
                //bottom

                if ( ($current_depth - $numbered_items_min + 1) > 1){
                        $html .= '<span class="toc_number toc_depth_' . ($current_depth - $numbered_items_min + 1) . '">';
                        $html .=  '- </span> ';
                        $numbered_items[$current_depth]++;
                        $html .= '<span class="toc_list_second_char">' . strip_tags($matches[$i][0]) . '</span></a>';
                }
                //top

                else{
                        $html .= '<span class="toc_number toc_depth_' . ($current_depth - $numbered_items_min + 1) . '">';
                        for ($j = $numbered_items_min; $j < $current_depth; $j++) {
                                $number = ($numbered_items[$j]) ? $numbered_items[$j] : 0;
                                $html .= $number . '.';
                        }
                        $html .= ($numbered_items[$current_depth] + 1) . '</span> ';
                        $numbered_items[$current_depth]++;
                        $html .= '<span class="toc_list_top_char">' . strip_tags($matches[$i][0]) . '</span></a>';
                }
        }
        else{
                $html .= strip_tags($matches[$i][0]) . '</a>';
        }
}2階層目のナンバリングは- </span> を追加することにより、非表示にしています。
また、CSSでデザイン調整できるように
1階層目は<span class="toc_list_top_char">を追加しています。
2階層目は<span class="toc_list_second_char">を追加しています。
screen.min.cssの修正
.toc_list_top_char .toc_list_second_char 追加
     .toc_list_top_char {
    font-weight:900!important;
    color: #315096!important;
}
.toc_list_second_char {
    font-size:18px;
    color: #315096!important;
}
上記のコードをscreen.min.cssの末尾に追加することでデザインが有効になります。
以上が目次のデザイン調整です。後で振り返ったときにどうやったか忘れないようにここにまとめておきます。
プラグインのバージョンが変わったときに都度大応する必要がありそうです。


Excellent blog here! Also your web site loads up fast!
What web host are you using? Can I get your affiliate link to your host?
I wish my web site loaded up as fast as
yours lol
thank you.